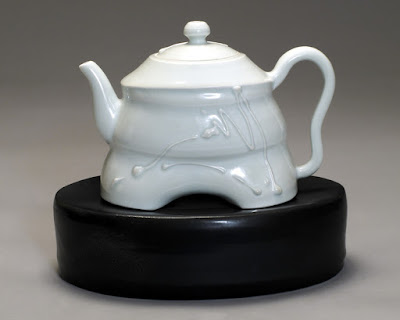
Form and Function
Intro to clay sculpture:
Aesthetic thinking in Clay
Elements of Art and Principles of Design 

Organic
Geometric

Line

Color: Analogue / Complementary
Simple 3colors / multiple colors
complementary
Shape
• Actual texture -can be felt
• Implied (or simulated) textures – shown through drawing
Space
Positive /Negative space

Value- the lightness or darkness of a color
*Value can show 3D effects
Emphasis: Stands out
Contrast:
• the arrangement of
opposite elements
(light vs. dark colors,
rough vs. smooth
textures, large vs.
small shapes, etc.)
in a piece so as to
create visual
interest, excitement
and drama.
Movement
Unity-a sense of harmony and wholeness, by using similar elements within the composition and placing them in a way that brings them all together
Variety
Abstract form/ Realistic form
Functional/ Decorative Art
Functional
Decoration
Assignment 1
Create a slide to answer the following Essential Questions:
1. Do you consider yourself creative? Why or why not?
2. What is the difference between fine art and craft?
3. How do we communicate thoughts and feelings in the creation of both sculptural and functional forms?
What is a pinch pot?
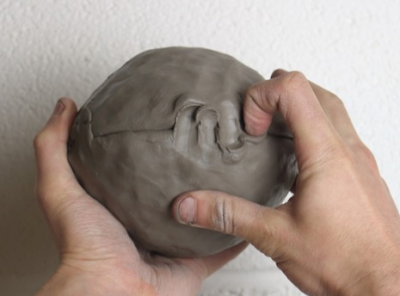
Simple clay vessels such as bowls and cups of various sizes can be formed and shaped by hand using a methodical pinching process in which the clay walls are thinned by pinching them with thumb and forefinger. ... Thumbs are pushed into the center, and then rudimentary walls are created by pinching and turning the pot.
History of Pinch Pot
Pinch or thumb pots are one of the oldest forms of art, dating back to about 12,000 years. They are as contemporary as they are ancient. When you begin your first piece in this method, as many other ceramic students do around the world, you are participating in an activity that has captivated creators for thousands of years. A well-formed pinch pot has a simplistic beauty all its own, or it can become a base for ceramic forms as complex as you can imagine. Welcome to the world of clay!
1. Score around the rims of each pinch pot with a knife. You can crisscross the score marks and add slurry or water to help the clay stick.
2. Slip: A mixture of clay and water used to join scored pieces of clay.
Simple clay vessels such as bowls and cups of various sizes can be formed and shaped by hand using a methodical pinching process in which the clay walls are thinned by pinching them with thumb and forefinger. ... Thumbs are pushed into the center, and then rudimentary walls are created by pinching and turning the pot.
History of Pinch Pot
Steps of joining double pinch pots
1. Form a ball of clay
2. Open
3. Pinch in to make the bottom
4. Pinch and Rotate .
Pinch
Pinch more
Until done
Double Pinch Pot Joining Technique
2. Slip: A mixture of clay and water used to join scored pieces of clay.
Apply slip
3. Place the pinch pots together. This is the most crucial part of the making process! Push one rim into the other by digging your finger in just a little and pushing over to the other side. Repeat all the way round the join. It doesn’t need to look neat!
4. Shaping
Once joined you can gently hit the pot with a stick all over to compress and reinforce the join. Get it into a round shape and knock out the join and pinch marks, patching up any holes using the above technique.
5. Shape the piece to your desired shape. Air hardening clay may not get much taller, but you can use modeling tools to create a smooth surface and define the shape by smoothing up and down.
The rubric of Functional Pinch pot sculpture:
How do artists & designers determine goals for designing a sculpture?
2. Be creative with form and function to express a Topic/Big idea and Purpose:
3. Use the addition process to add clay to basic form- sculptural elements, handles, lid, hat, ears, insects leaves, flowers, nose....
4. Form a rim/ flange/ irregular edge to secure the lid /cover
5. Cut out apart/ Hollow Cut out
5. Use subtraction process- carve out holes, draw on clay, relief carve, carve to shape, add texture.
6. What is good craftsmanship?
Nothing jagged or it will be sharp. Edges are smoothly refined. The form is carefully planned. Walls are even thickness. Joining is secure and hidden. All surface is smooth without careless bumps, dented remarks and scars. The final pinch pot sculpture is built with standing balance without wobbles.
Nothing jagged or it will be sharp. Edges are smoothly refined. The form is carefully planned. Walls are even thickness. Joining is secure and hidden. All surface is smooth without careless bumps, dented remarks and scars. The final pinch pot sculpture is built with standing balance without wobbles.
· Assignment 2
·
What methods and processes are considered when preparing artwork
for presentation or preservation?
Answer the following questions in the Form and Function worksheet1. What
are the theme and the purpose of your form and function pinch pot sculpture?
· 2. Details of the form and function pinch pot
sculpture
*.*What will
your sculpture be used?
*What shape will your sculpture be?
*What shape will your sculpture be?
*Is the shape of your
sculpture geometric or organic?
* How many combined two pinch
pots will you used for the sculpture?
* Where will you use addition /subtraction techniques for the
sculpture?
* Where will you use the technique of cut out apart/ cut them
apart to the sculpture?
* How will you use addition process to add clay to basic
form- sculptural elements, handles, etc…?
* How will you use subtraction process- carve out holes, draw on
clay, relief carve, carve to shape, add texture?
3.
Draft- Draw the form and function
sculpture construction
Assignment 4
Please including at least 3 references you have
searched online
· Form
· Addition
· Subtraction
· Color
· Function
4. Draw the Final form and function sculpture
What will your final form and function
sculpture look
like when you have added theme decorations?
Draw on the worksheet from at least two views
(top, side, front, back, corner, bottom..)
Assignment 3
Continue the slide to answer the following aspects:
1. Showing pictures of form and function sculpture in progress including combined pinch pot, addition, subtraction to demonstrate clay techniques.
2. Showing Pictures of decorations/textures to support the theme and function
3. Showing Pictures to demonstrate you have carefully used the craftsmanship to make you sculpture
Nothing jagged or it will be sharp. Edges are smoothly refined. The form is carefully planned. Walls are even thickness. Joining is secure and hidden. All surface is smooth without carless burns and scars. The final pinch pot sculpture is built with standing balance without wobbles.
Assignment 4
1. Showing pictures of painting underglaze on the Bisque Ware
2. Showing pictures of final Glaze Ware
3. The final statement of the big idea of making the Form and Function sculpture
4. Art critique:
How can your Form and Function sculpture be used in the production of both functional and sculptural forms?
Please use the following criteria to answer the question
*Analyze and explain how you use the pinch technique to create a form with good symmetry, basic shape, and even thickness throughout?
*Analyze and explain how you use the pinch technique to create hollow forms and sculptural pieces, possibly in combination with other hand building techniques.
*Analyze and explain how you deliberately alter the basic pinch form to achieve interesting/dynamic forms.
*Analyze and explain how you demonstrate knowledge of pinching as a basic forming method to achieve your goal.


