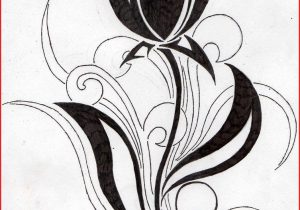
KORU Linocut Printmaking
The koru is a spiral shape based on the shape of a new unfurling silver fern frond and symbolizes new life, growth, strength, hope, harmony, and peace.
The circular shape of the Koru helps to convey the idea of perpetual( never-ending) movement while the inner coil suggests a return to the point of origin.
Māori is an Eastern Polynesian language spoken by the Māori people, the indigenous population of New Zealand. Since 1987, it has been one of New Zealand's official languages.
What is Printmaking?
The art of Printmaking has been around since the 800’s and has evolved into many different types of printmaking over the years. Some of the more popular types of printmaking are; relief, monoprint, collagraph, screenprinting, lithography, and intaglio etching.
What is a Linoleum Block Printmaking?
- A linocut is a reductive print made by removing linoleum rubber with a carving tool. The remaining raised design is inked and printed on paper. A series of many can be made from a single carved stamp.
- A design is carved into a linocut block and linked with a roller called a brayer, Next paper is laid on top of block and press firmly. The design will be transferred to the paper.
-

-


Student Goals:
- Safe use of tools
- Printmaking techniques/vocabulary
- Positive/Negative space
- Well designed composition
- Reductive printing process
- Editioning a series of work
Assignment 1: Essential Questions
1. How do form, content, and context express and influence meaning? What does the object you used mean to you?2. How do elements and principles facilitate the creative process?
3. How do your skills and techniques enable the creative process?
4. What is an artist series? Why would an artist work in a series? Is it something that you want to keep a record of?
Rubric
1. Students will create a drawing incorporating the use of transferring the image for the printmaking process.2. Students will use KORU symbolism in their drawings to convey a message in their prints.
3. Students will complete a self-reflection that demonstrates an understanding of how print is made and used, and how symbols can convey meaning.
4. Students used materials with an awareness of process and safety, students stayed on task, students will be respectful of other student’s work.
Final Product:
You will be creating a series of 6 prints. You will be submitting 1 of each color combination to be graded.
Choose a Koru symbol as one of your subject Planning is especially important for linocuts as material, once removed, can not be re-applied. It is a one-shot deal.
1. Ask the following questions to determine your topic/big idea:
- What is your hope and dream of a new life to the world/society/yourself?
- What is the strength and growth you wish to gain?
- If you had the power to change the world, what would that be?
- What objects/animals/symbols/patterns will you draw to symbolize the big idea?
- What topic will you research in order to deepen your big idea?
- Besides the Koru symbol, what patterns and texture will you incorporate in your design? Draw 5 textures/Patterns.
- 2. Design a drawing:
- Use a Koru symbol combined with one or collective objects to present the meaning of new life, growth, strength, hope, and peace.
- Composition: off-center/ Crop off/ Rule of third
- 50 %Positive space colored with Black and 50% Negative space leave it White
- Sketch the 2-4 different ideas or the same idea but in different compositions2. pick one subject based on the big idea( animals/ flowers/ instruments / buildings/ nature scenes/ others)3. Three Textures/ Patterns
4. Design a great composition- Off-Center
- Rotation
- Crop out
Off-Center
RotationCrop out
1. Answer questions from the worksheet
2. Search for references and information to support your big idea. In each square, choose one subject ( the positive space ) for your composition
3. Fold a piece of 4.5x12 paper into two 4.5x6 rectangles. The final composition will be a 4.5x6 rectangle.
4. Develop 2 possible compositions in each square. Try to place your subject off-center.
Culture connection
Team Work
Ocean Pollution
Use References
5. Choose the strongest composition for your final artwork
6. Make sure to use a variety of lines/textures in the background(negative space) OR/AND visual texture in the subject. You should have included a Koru symbol in your drawing.
7. Make sure you have 3 textures and the Koru symbol in your drawing.
8. The drawing should not be too small in the square.7. Make sure you have 3 textures and the Koru symbol in your drawing.

Step 2: Positive and negative space
1. Choose a strong composition for your linocut.
2. make sure to use a variety of lines in the background ( negative space) or the visual textures in the subject.
3. The drawing should not be too small in the box or placed directly in the center.
4. Trace the drawing onto the second sheet of 6X12 paper ( provided) to demonstrate two possibilities of positive and negative space.
5. Mark approximately 50% of the areas as B and the rest as W (black or white) on one tracing.
6. Color in B areas with a black sharpie. Bs will be raised. Black lines should be thick white lines can be thin.
*Make 2 black and white
Step 3: Transferring sketch to block
1. Choose one of the two for the final artwork. Use tracing paper to trace your composition in pencil.
1. Choose one of the two for the final artwork. Use tracing paper to trace your composition in pencil.
8. Place the tracing paper face down on the rubber plate.
9. Tape the tracing paper down so it won't move when tracing.
10. Use the end of a sharpie/ finger to rub the graphite onto the plate ( so the design will be transferred)
11. Sharpie the drawing on the linocut. Your print will print the correct way on paper.
2. Carving out design. Remember, what is carving out will not show the ink.
Step 5: Printing:
1. When you are done carving out your design, we will test print the linocut plate. Test printing your block on a piece of typing paper before printing on the final paper (you will see if you need to carve any additional sections or carve any sections lower).
2. Have paper ready - write your name on printing paper in pencil. Set up your 8x8 paper with brackets in each corner to center your block when printing.
3. If you need to carve more of the linocut plate, rinse off the ink before using the carving tools.
4. Dime-sized amount of ink.
5. Roll the brayer up and down, then side to side on the ink tray to get an even layer of ink
6. Repeat the process on the plate.
7. Place paper down on the plate - hold with one hand while rubbing with the other.
8. Print! (6 prints, 2 of each color) Example: 2 red prints, 2 black, 2 purple.
At least one print should have a gradient of colors.
9. Place prints on the drying rack immediately.
Step 6: Final touch:
1. Sign your name in pencil on the bottom left of the border.
2. Complete the linocut rubric.
Include the three 3 prints in the slide for grading.
Step 7: Slide
Step 7: Slide
What is KORU?
A symbol of New Life, New Beginnings, Strength, Growth, Peace, Harmony, and Hope.
The koru is a spiral shape based on the shape of a new unfurling silver fern frond which symbolizes new life, growth, strength, peace, harmony, and hope..
The circular shape of the Koru helps to convey the idea of perpetual( never-ending) movement while the inner coil suggests a return to the point of origin.
Māori is an Eastern Polynesian language spoken by the Māori people, the indigenous population of New Zealand. Since 1987, it has been one of New Zealand's official languages.
Examples of KORU designs :

Koru with nature objects
Koru with symbols
Get to know your tools
Lino Board
Brayer -ink roller
Carving tools
Ink Plate for inking up (glass, plastic, a tile, another piece of lino, anything that is smooth, flat and non-absorbent)
Sharpie
Pencil
Steps:
- Draw and transfer your design
- Create areas of light and dark
- Make a test piece to practice
- Carve out your design
- Shade your carvings with a marker pen
- Roll your ink onto the sheet
- Roll ink onto the lino
- Press paper onto your lino
- Press with a wooden spoon
- Peel off your print
- Compare your lino block and your print
- Leave your lino prints to dry


